refurbishment

Insulating a local landmark…

IMG_7834

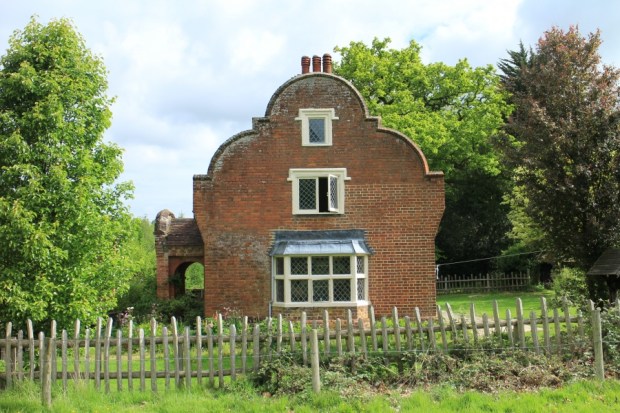
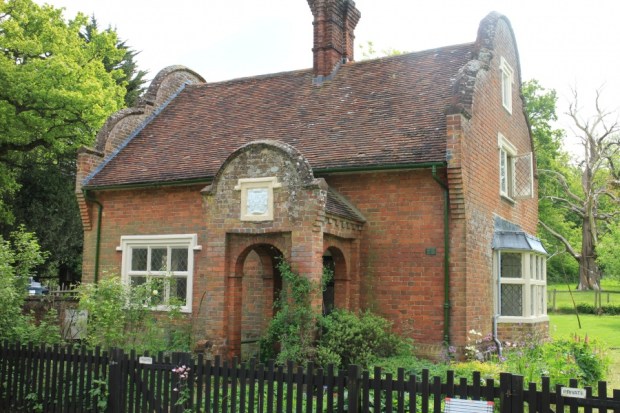
A beautiful example of vernacular Kentish architecture as influenced by the popular Dutch style originating from the 19th Century

Our small works team recently undertook the refurbishment of a Dutch-gabled Victorian gatehouse which is within the curtilage of a large country house near Ashford.  The property was in a state of dilapidation that had been expedited from historic condensation and previous poor workmanship.

goddinton_house_ashford

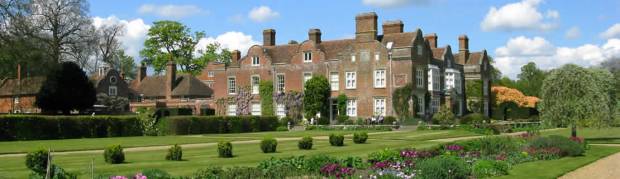
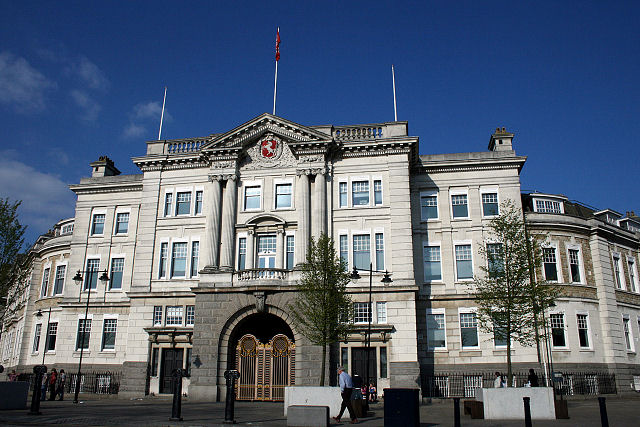
The main country house and grounds upon which the gatehouse is located within, photo: Kent Guides (c).


The aim of the project was to refurbish the building to a habitable state and to finally sort out the condensation issue once and for all.  The process proposed was to use an insulating wood fibre system but to install this via the internal faces of the building rather than the typical external faces method.  The internal face of the walls were lined with (the SPAB approved) ‘Warmshell Interior’ system of wood fibre by Lime Green.  After fixing, the boards were finished with a lime plaster to suit. ‘Warmshell Interior’ is a practical solution when fitting insulation to the outside of property cannot be achieved.  In this case, the building is apart of a country house’s estate and is therefore apart of the listing and also within a conservation area.  Due to this status we cannot alter or adapt the outside of the property, it wouldn’t be practical or in keeping with the architectural style of the building – therefore an internal system would have to be employed.

IMG_9186

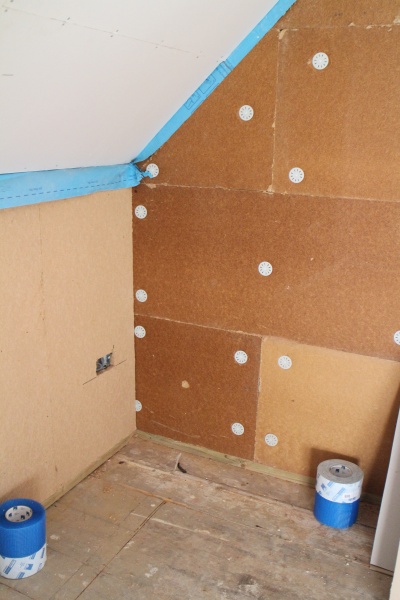
The insulation panels are installed

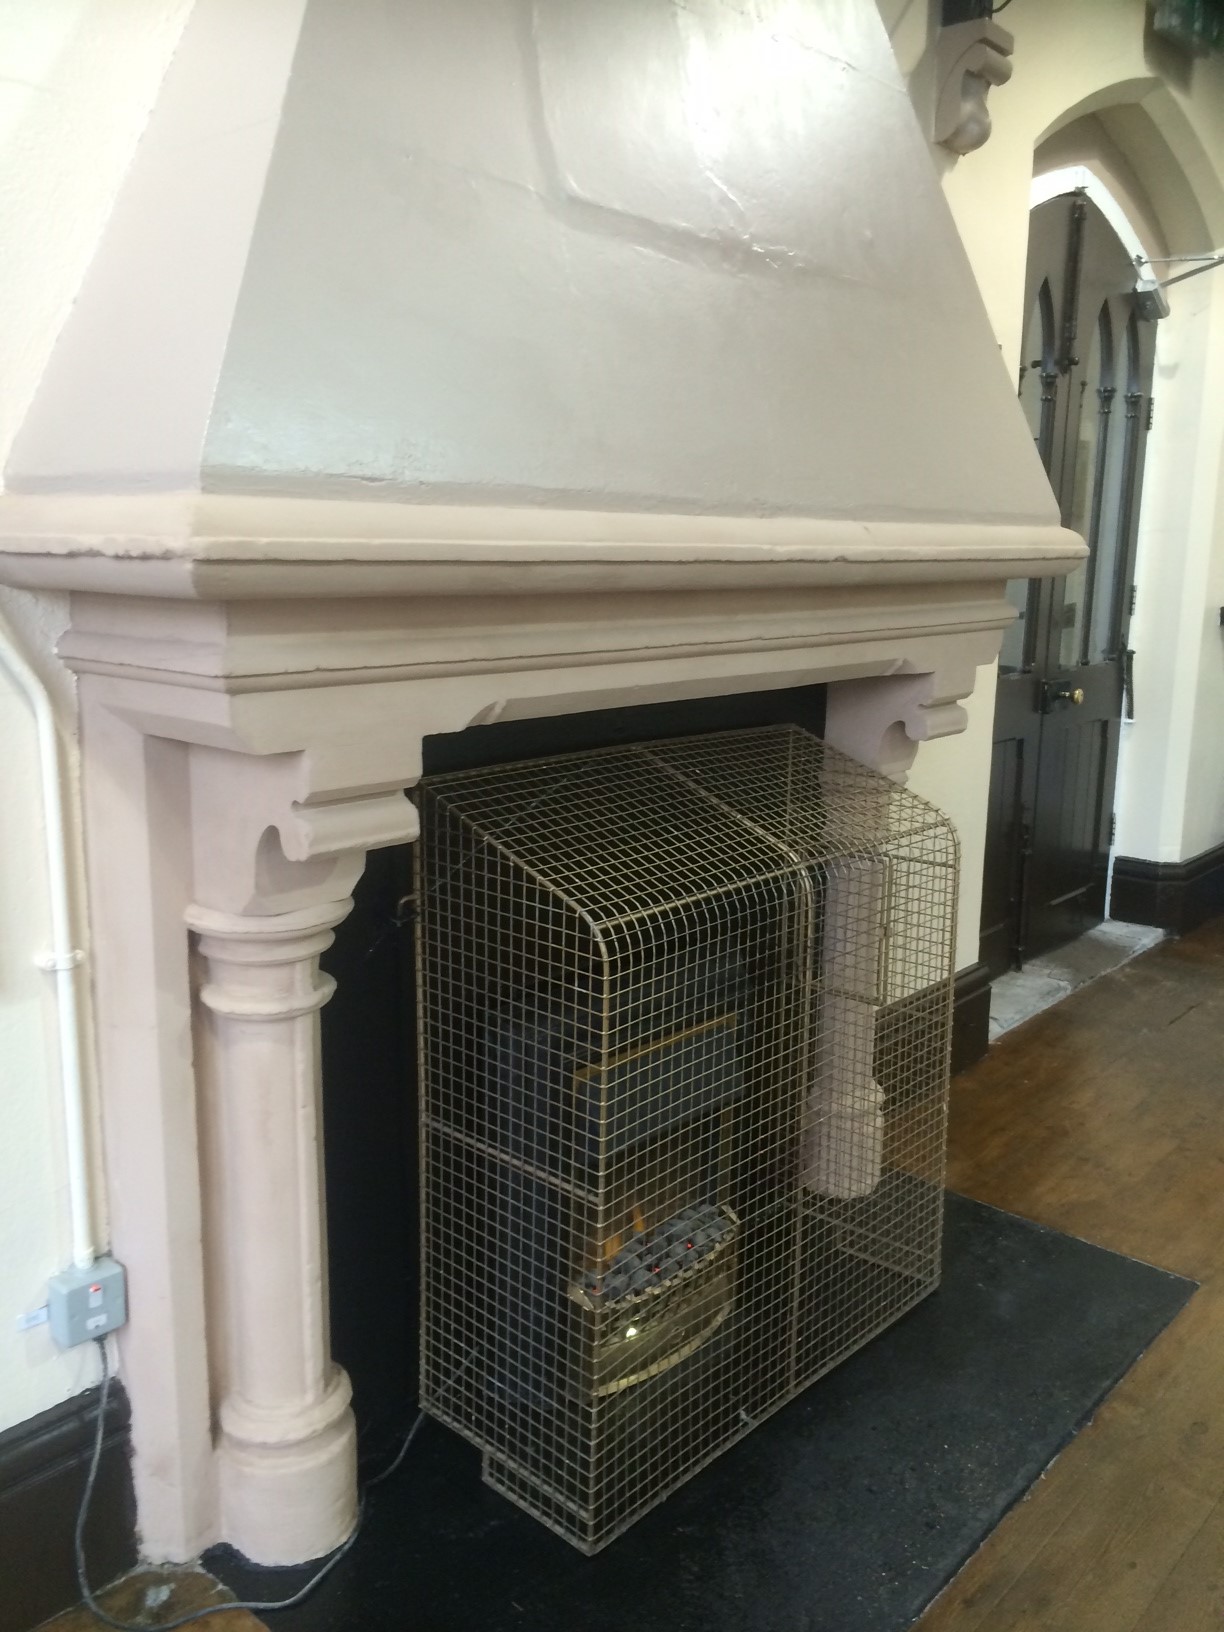
Both internal and external insulation methods have their challenges, and this was no exception.  Inside we had to move all sockets, switches, pipes, radiators, partitions and door frames plus building supports for the new insulation panels, along with all the necessary making good and conservation to the existing structural timbers.  It became a large undertaking but the final result was well worth it.

IMG_9179

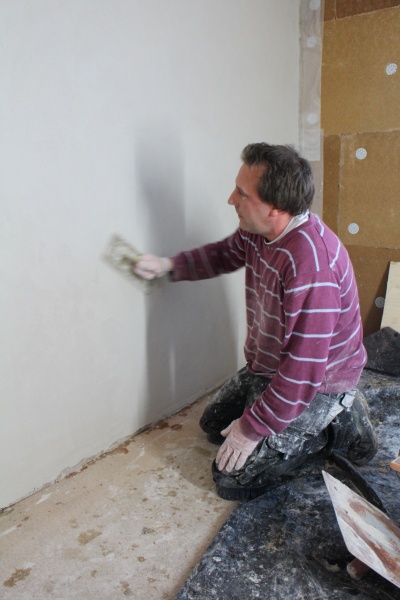
Redec Plasterer Mark gives the walls a final skim of lime plaster

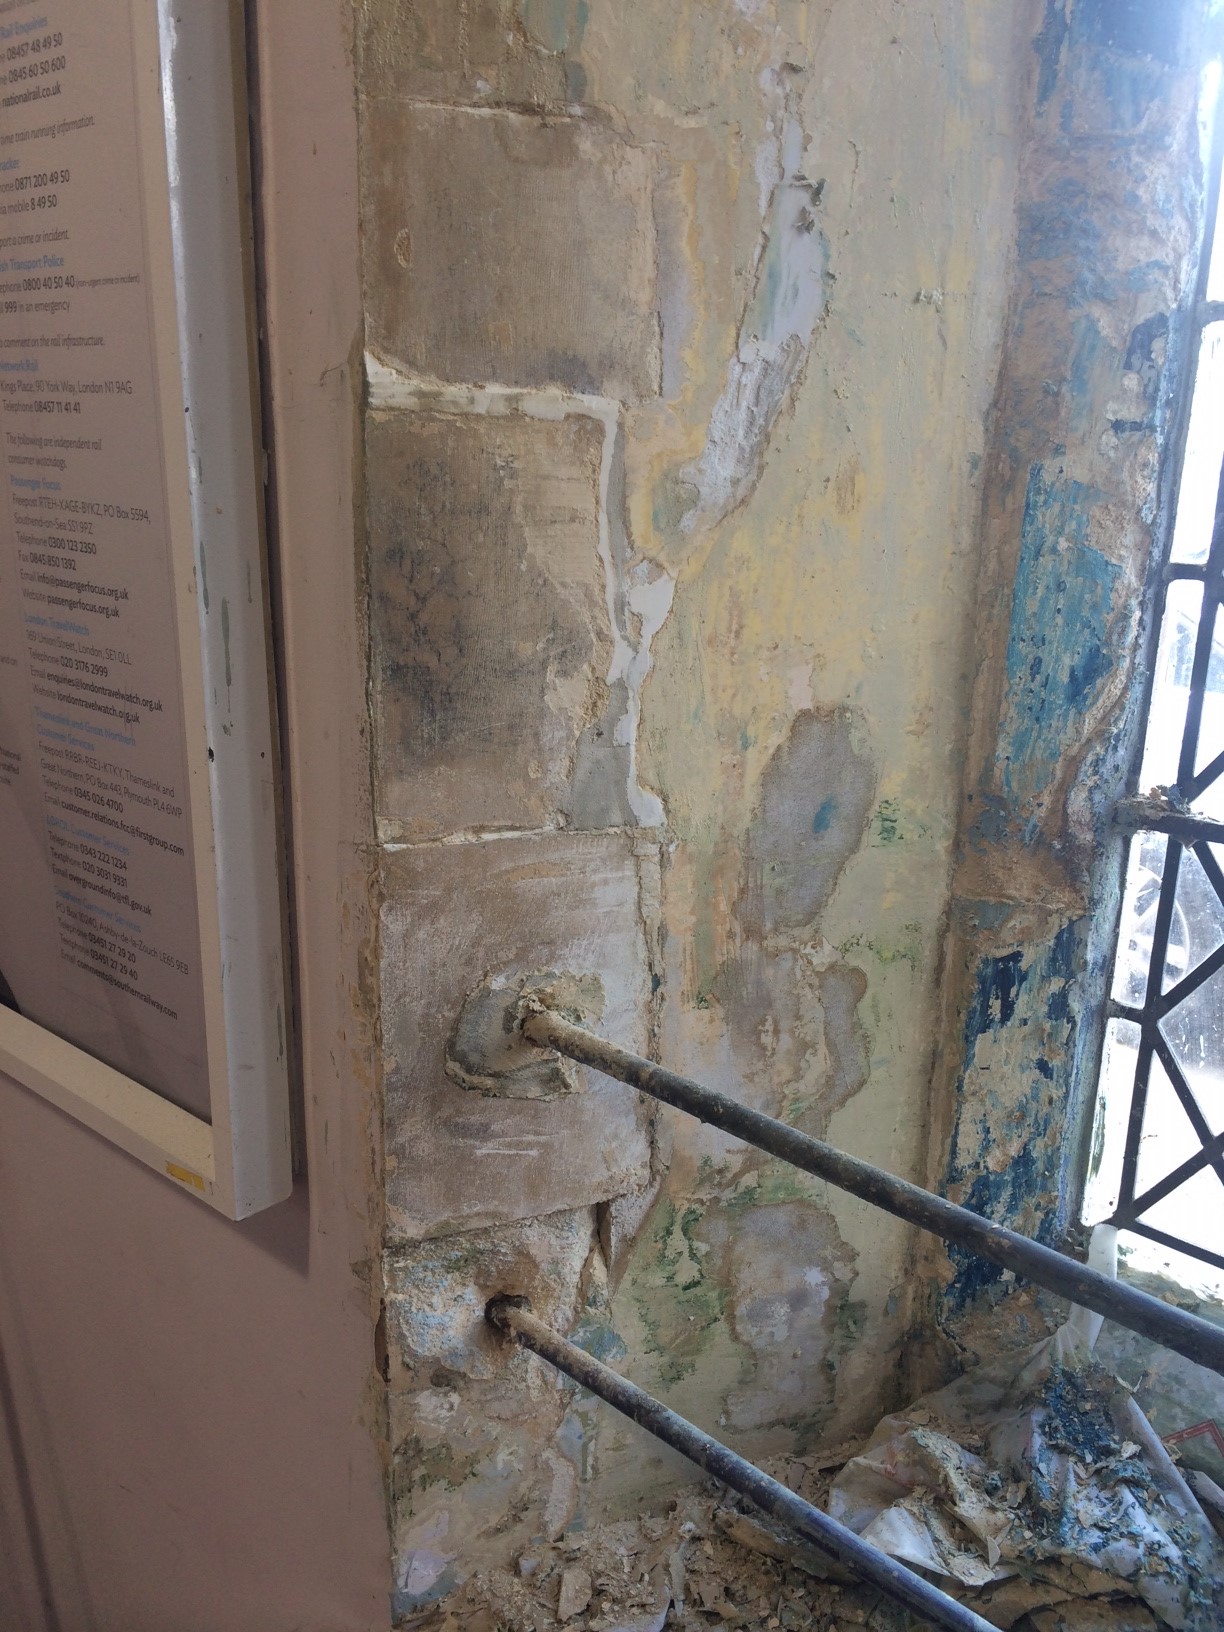
Once all wall fixings and furnishings are moved or temporary disconnected, the Warmshell insulation boards are secured to the internal wall faces.  The insulation boards are cut to size and fixed into position (cables for sockets and light switches may need to be extended through the insulation, though this isn’t always necessary).  The wall insulation is plastered with lime and then decorated with a suitable breathable paint such as clay based or a limewash.  This whole system of insulation uses natural lime plasters, paints and wood fibre boards which allow the walls to breathe – which should overtime cure any condensation issues and work in tandem with the original historic fabric of the house.

IMG_6115

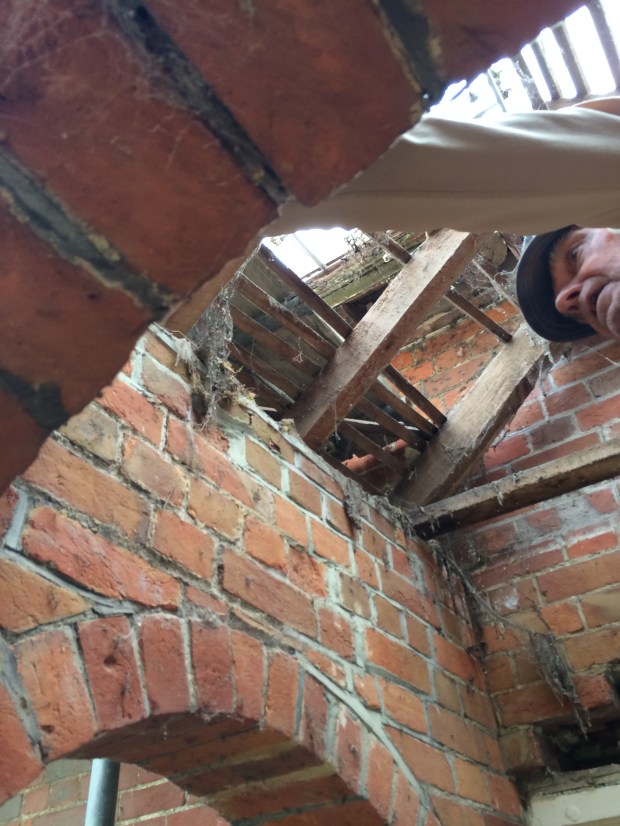
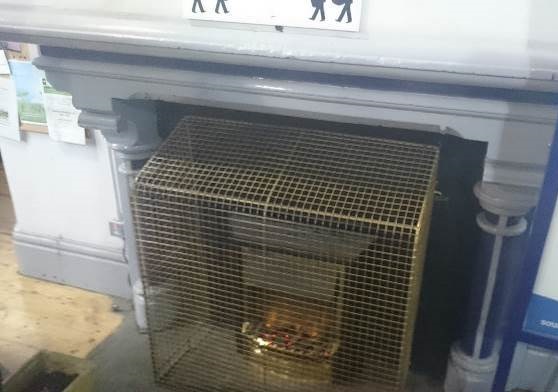
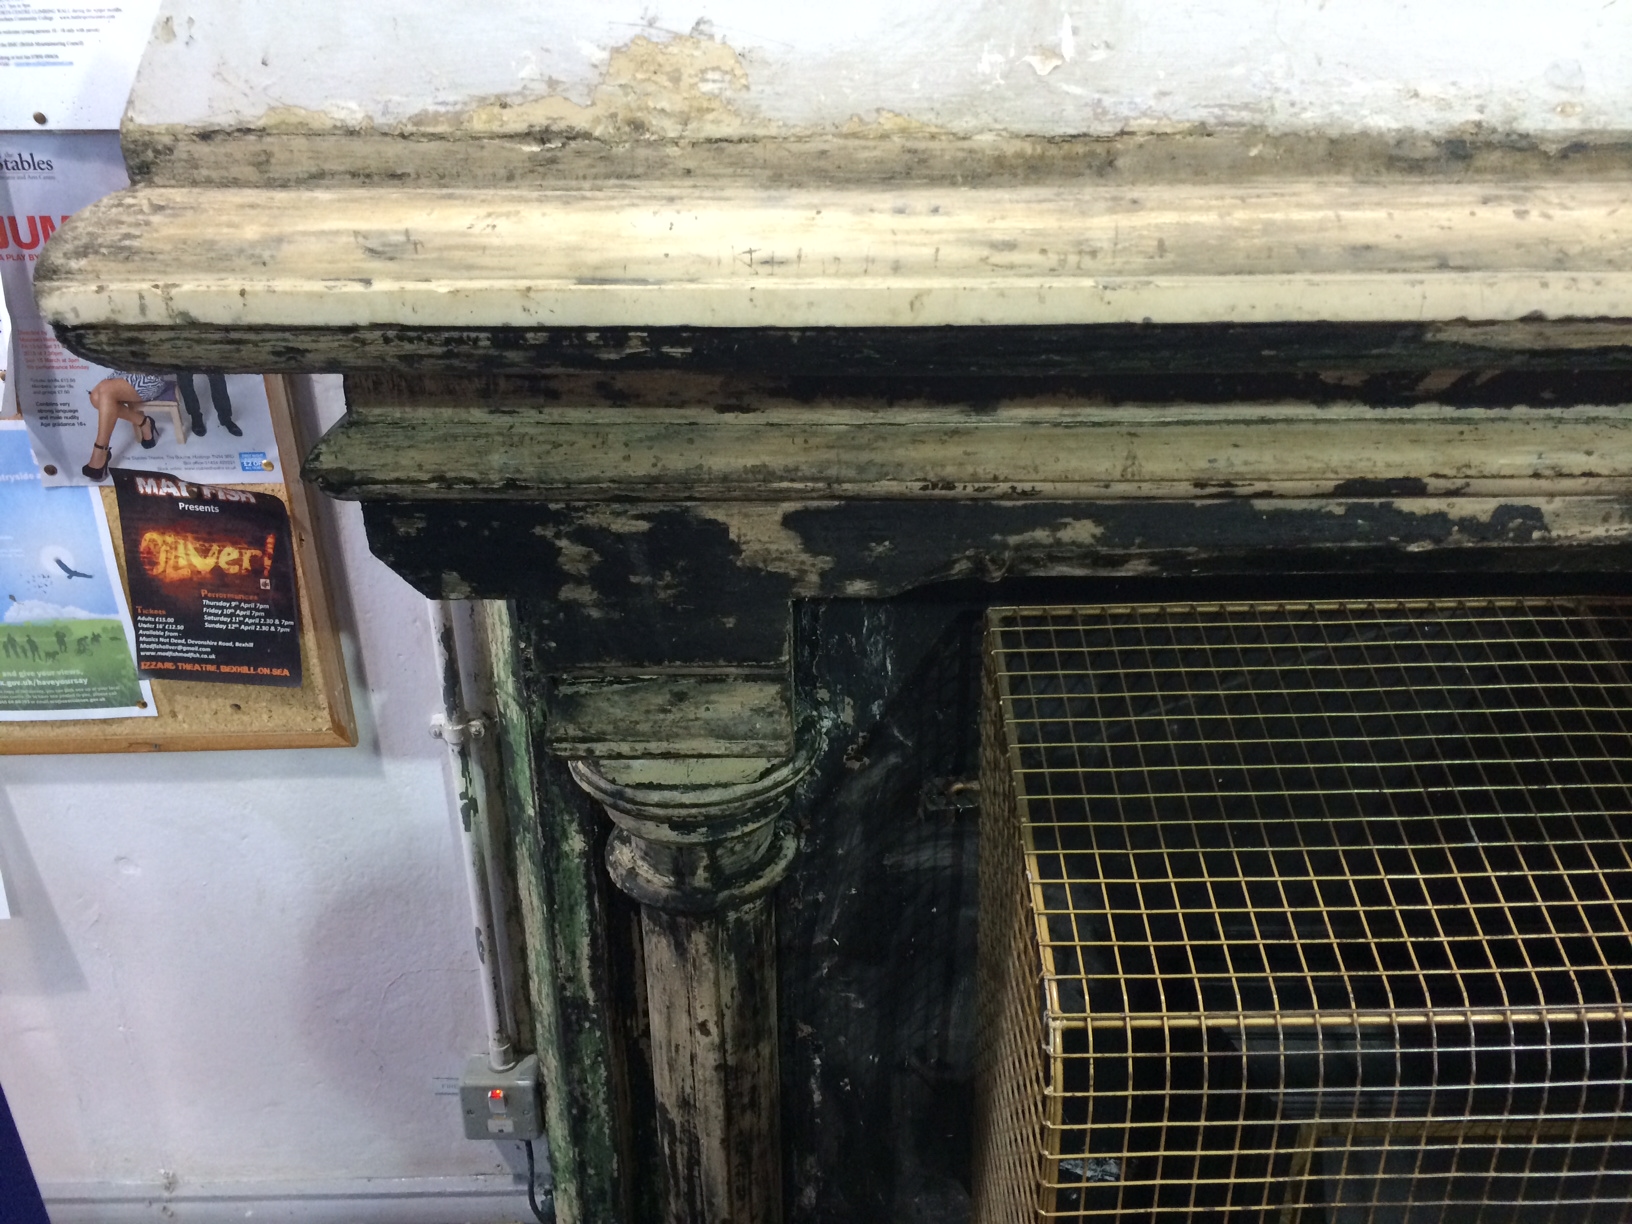
Redec Mason Len works to conserve the porch

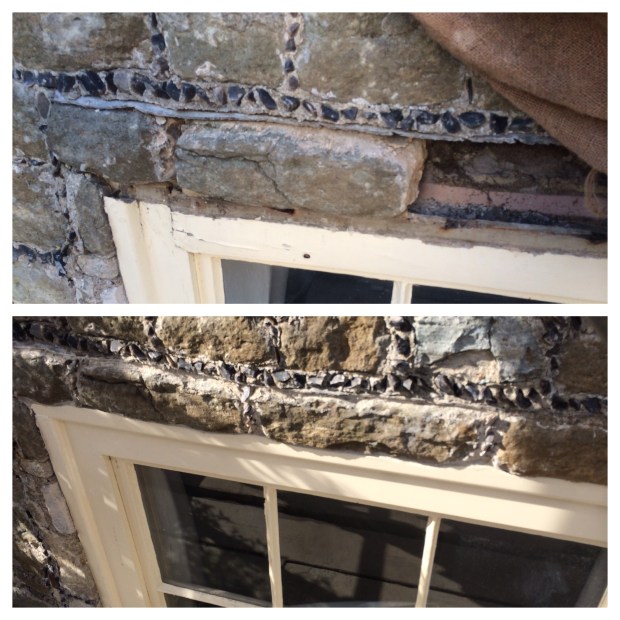
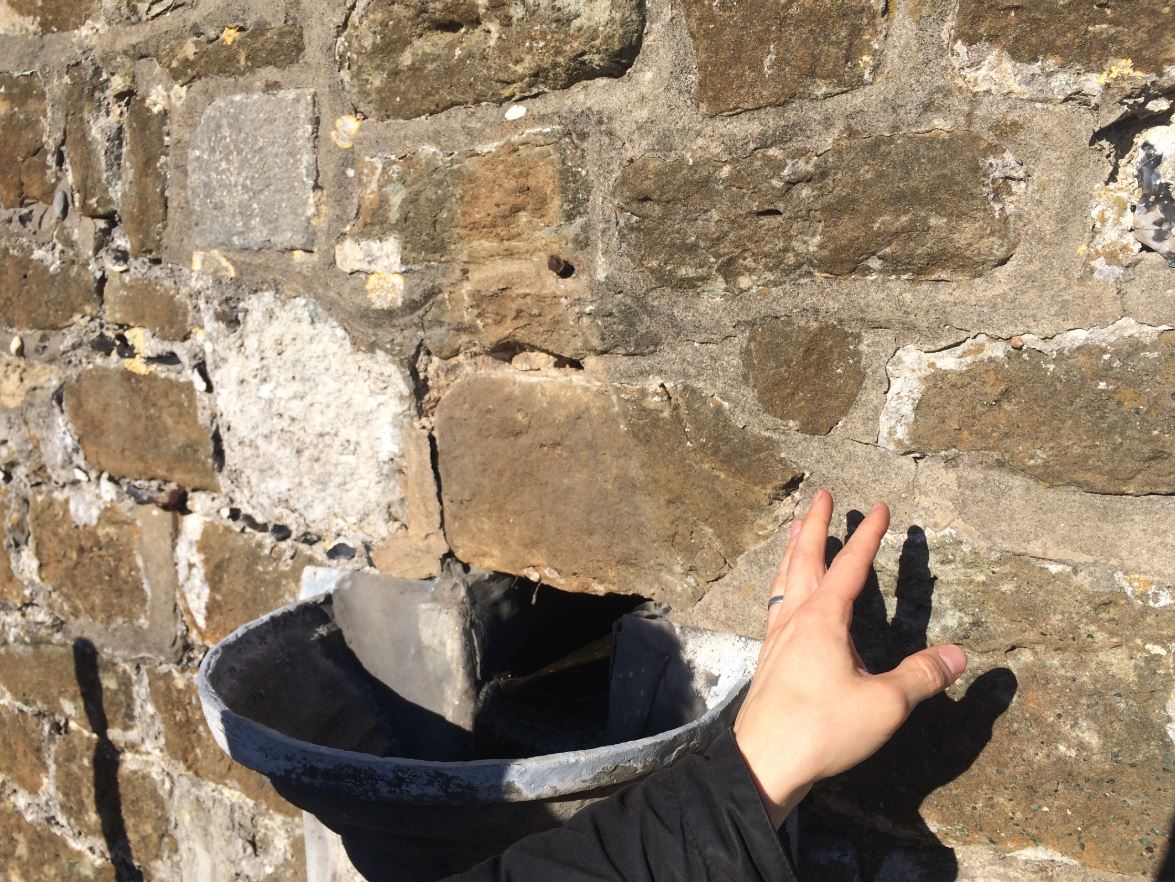
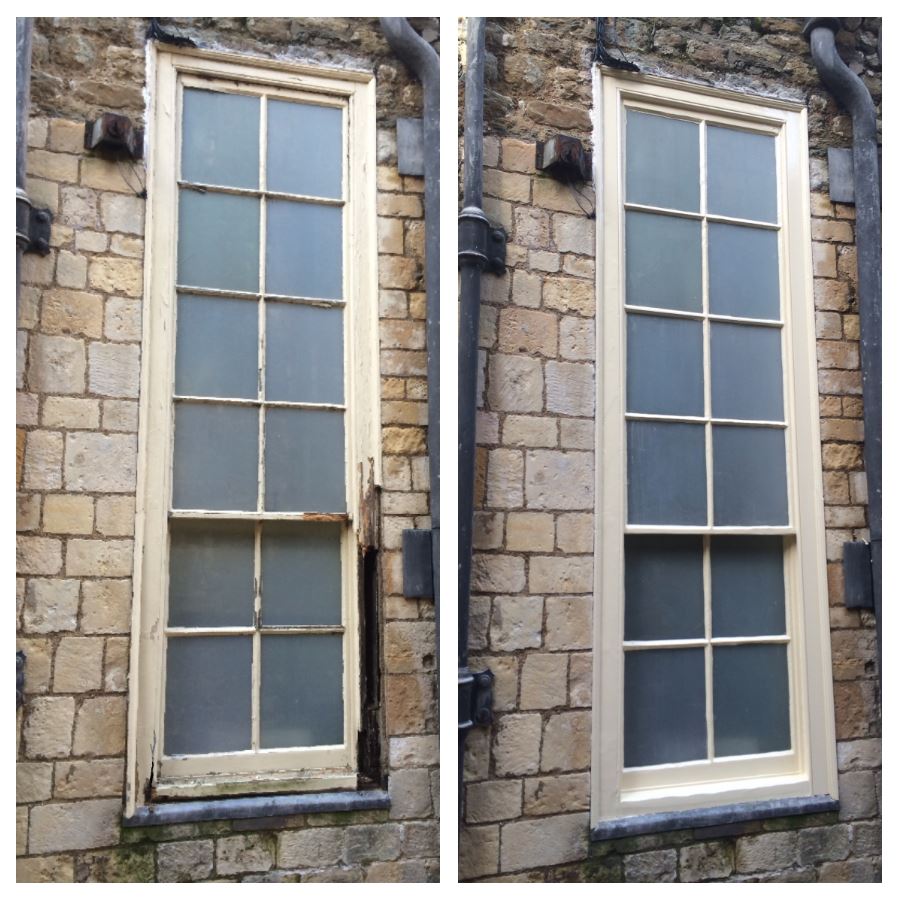
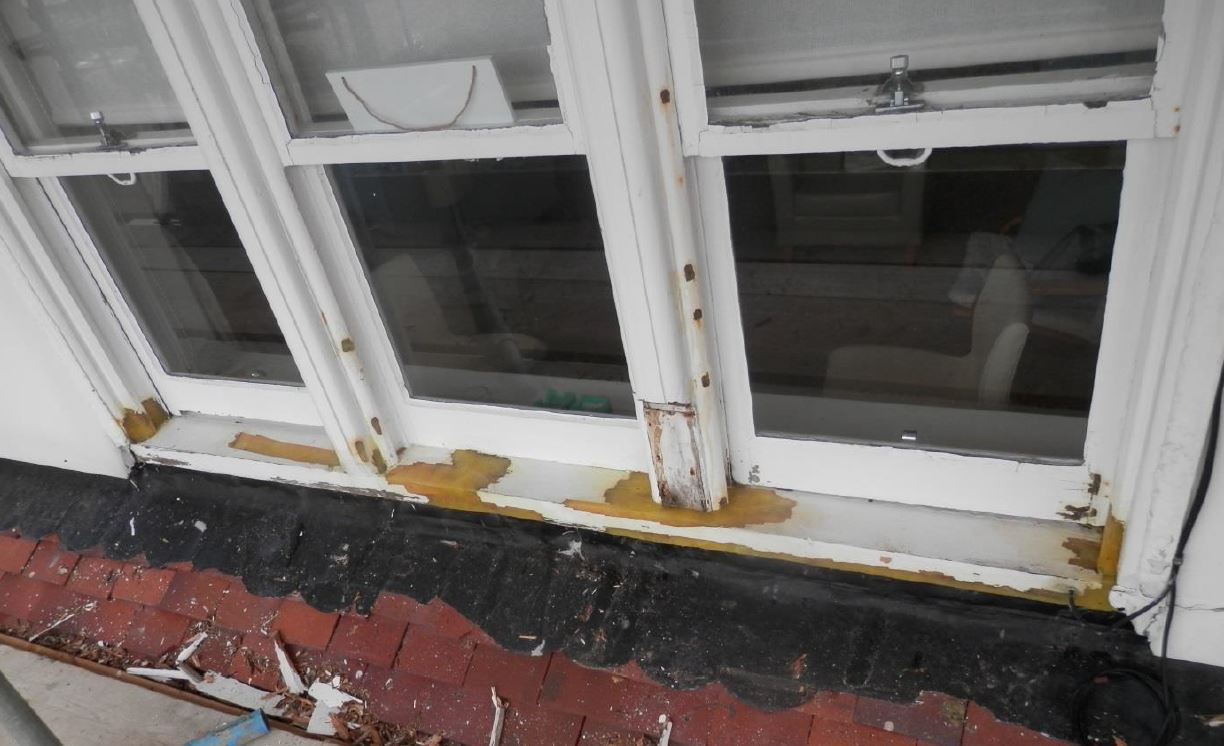
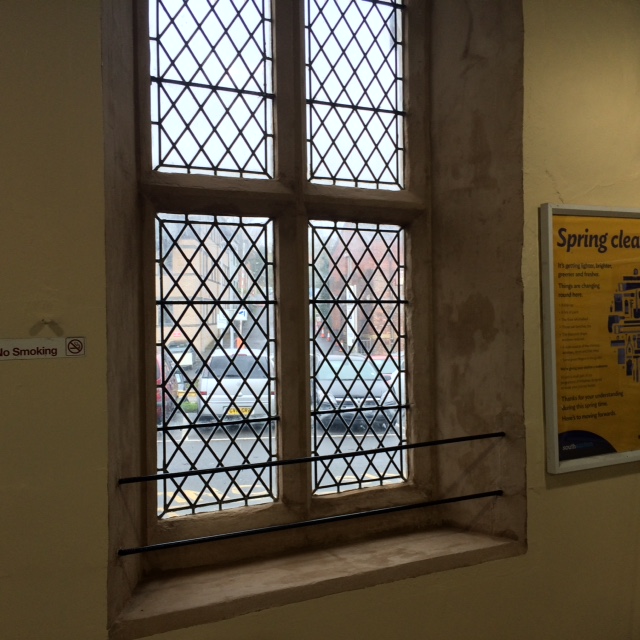
The works also included installation of a new kitchen and bathroom, conservation repairs to windows and structural timbers, lime repointing and brickwork repairs throughout, sheep wool insulation to the loft, a full re-wire, installation of a complete new bay window, roof repairs, glazing replacements, redecoration and renewal of all floor coverings.  The works were supervised by Conker Conservation and approved by Ashford Borough Council’s Conservation Officer.

IMG_6208.JPG

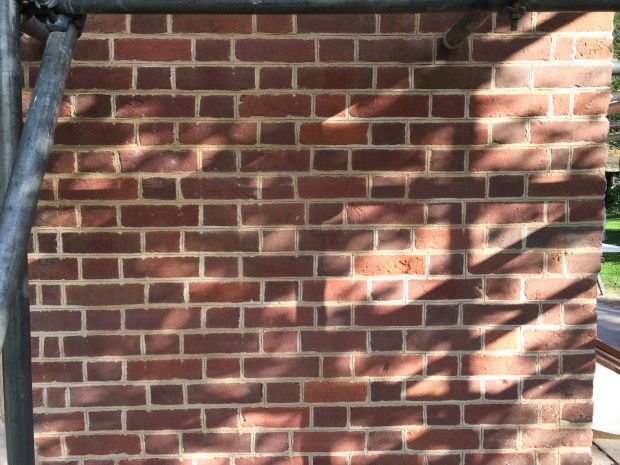
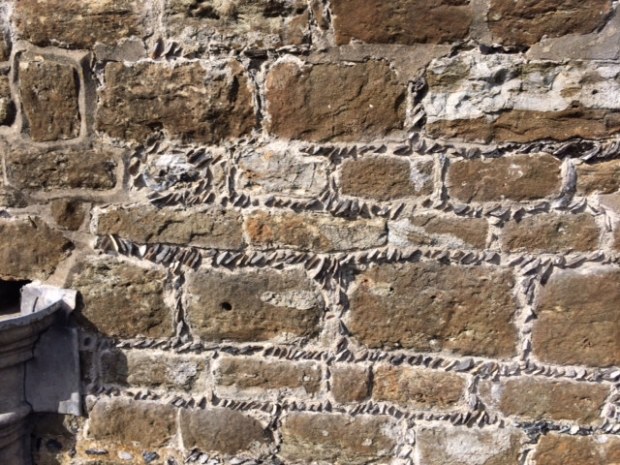
A newly penny-pointed lime mortar wall – can’t see the difference between the new and the old pointing?  That’s the Redec quality difference right there!

IMG_7832

The finished project

You need to have the knack when you knap a gallet…

walmer castle

A small section in progress


Our stone masonry section within Redec maybe one of the smallest departments but it is definitely one of the busiest. Running all over the South East of England working on Castles, Stately Homes and Grand Estates, undertaking larger projects such as our recent successful refurbishment to Walmer Castle to small sites where only a small amount of consolidation or repair may be required, they are true #heritageheroes.
One such project this summer included a huge amount of lime repointing to a galleted rubble-core stone wall. The process of galleting required gallets (or prepared flint flakes) to be placed within the mortar beds to act as spacers/protectors throughout the stonework, they are often dressed into the mortar in decorative patterns with their quality and sizing being very important to the beds they are installed in. It is always important to retain and conserve the original gallets as much as possible, however when further gallets are required the flints must be prepared onsite by means of knapping to match the missing or damaged gallets within the walling that you need to repair.

IMG_7338

Before and after to a lintel section

Knapping can be carried out in a variety of methods depending on the purpose of the final flakes. For stone tools and flintlock strikers, chert is worked using a fabricator such as a hammerstone to remove linear flakes from the core of the fint. The process is a little haphazard, so it has to be undertaken over and over to produce enough gallets to undertake the works at hand. Flakes can then be further refined using wood, bone, and slicer tools to perform pressure flaking to create the finer gallets. Once the process is completed (often by the junior member of staff), the gallets are handed to the senior mason who works out a plan based on the quality and sizing to install the best gallets into the prepared walling.

gallets

A bucket of gallets, next to a bucket of prepared NH lime mortar

The knapping process can be very painstaking but great attention to detail must be taken to avoid accidents, as such full PPE should always be provided. Selecting an open space, away from human or vehicular traffic is always best and despite being out in the open air, full dust masks should be provided that has been fully face-fitted (which is now a HSE requirement).
Proceeding on this basis will ensure your stone walling is conserved to a high standard.

Redec Partners with Kent County Council

County Hall Maidstone

County Hall Maidstone where the Framework contract was signed this week

We are delighted to announce that Redec has been appointed onto the prestigious new KCC Principal Contractors Framework. Securing a place under Lot 1 for projects from £1 to £750,000 with a projected contractual spend of £90m on either a design and build or construct only basis. The ethos of the new Contractors Framework will be to provide the highest degree of professionalism in the way that Kent County Council projects are delivered and to create a dependable list of local contractors to drive the county’s big plans forward from 2016 onwards.


The framework will last for 5 years and will include increased apprenticeships and training, community benefits such as local purchasing, the use of BIM, increased engagement of local SMEs and reduction in construction waste being sent to landfill.  KCC being the largest property owning body in the South will engage the select contractors from this new framework for all works to schools, colleges, offices, pupil referral units, care homes, waste disposal sites and transportation within the county with other buying authorities able to join the list from next year.


Redec Director Chris said, “This is a fantastic opportunity for both the County and our Company.  It is something that I personally have been working on for over 2 years now, and I cannot wait for it to commence.  Working closely alongside 19 other organisations in a spirit of collaboration will ensure the property portfolio of Kent will be in safe hands for years to come.”

Colouring a Castle…

Walmer Castle & Gardens

Walmer Castle & Gardens

This week our Supervising Decoration Conservator Roger talks about how he and his team worked with English Heritage to match the colours of Walmer Castle during our recent contract as main contractor to conserve and refurbish this beloved castle…

Colour is very important at Walmer Castle. The castle has a vast array of colours throughout the property, which have been sympathetically updated from each custodian to the next. Though colours and finishes have altered through the years the main stalwart of the castle is the use of “Walmer Blue”. The colour, which is unique to Walmer was exceedingly difficult to colour match.

Various samples sent off for analysis

Various samples sent off for analysis

It was only in the middle of the last century that paints became industrialised for use. Popping down to your local hardware shop to purchase a tin of paint was not an option, so most people would engage an experienced decorator who mix the paint onsite (or at their yard) for the specific site they were working on.
It is also true that some large estates have interesting stories when it comes to the origin of ‘their’ colour; one such nearby example is Knole House in Sevenoaks (a National Trust property which Redec has also worked on), where the “Knole Blue” was a mixture of many leftover paints to form a ‘bluey-black’ colour that is seen throughout not only the house and grounds but also along Sevenoaks High Street. The likely origin of the Walmer Blue is likely a composite of colours used to satisfy the requirements of the then insitu Lord Warden and their family.

A decoration conservator's tool box

A decoration conservator’s tool box

The walls and panelling have been redecorated several times over the centuries with each coloration being slightly different from the last. Past redecorations were likely undertaken by the The Ministry of Works (1943 – 1970) and the Property Services Agency (1970-1996) whom would have likely used experienced decorators to match up the distinctive colour by eye; evidence of historic touching-up to the woodwork was evident in the corridor and rotunda.
For the 2015 refurbishment we decided to undertake a mix of modern and traditional techniques to discover the true makeup of the Walmer Blue. Initially it was within the project to match up the colours using Redec’s paint conservator and only touch-in the worst affected areas of damage to the corridor only. It was quickly decided that for the budget of undertaking this, we could match-up the colour and then redecorate the whole corridor rather than selecting just a few isolated areas.

A Redec Decoration Conservator applies the final touches

A Redec Decoration Conservator applies the final touches

Upon receiving this crucial decision, a call was made to leading UK colour expert Patrick Baty of London’s Papers & Paints Ltd. Patrick was briefed about the colour and requested samples of the paint work in various different locations were sent to his London office for analysis. In keeping with the past redecorations, the specification called for an oil-based eggshell to be used, which added time to the diagnosis of the colour due to the fact that oil-eggshell takes far longer to dry than a modern water-based paints. Initially the samples were placed under a microscope to see the composition of the paint. The samples’ stratigraphy (layers) and composition were all detailed and surveyed, these showed that the corridor area had received over 8 redecorations in the lifetime of the panels within the corridor, which were believed to date back to the 18th Century.
After which, using a variety of dark bases in this finish P&P crafted various samples daily to match the colour using the colour spectrum of the Munsell colour range, which is one of the widest colour ranges in the world. Daily updates were provided to English Heritage by onsite visits by our project manager (Chris) until finally the colour was identical to the samples received.
The big day came when on 16th December my team and I (as Supervising Decoration Conservator) received the paint matched to Patrick’s exacting formula from English Heritage’s preferred paint supplier ‘The Little Green Paint Company’. Quickly it became apparent that the colour had been matched absolutely perfectly. So well in fact that once areas had dried in the upper corridor, it was hard to tell where the new paint started and the old paint continued, other than the fact that the old paint was more worn from people traffic – on colouration alone they were identical!

The works have returned the drama to the central rotunda of the main corridor.  Photo copyright (c) English Heritage

The works have returned the drama to the central rotunda of the main corridor. Photo copyright (c) English Heritage

Though colouration of Walmer Castle’s interiors were only a small part of our works onsite, it goes to show that the devil is always in the detail and nowhere is this more important than when you are tasked with conserving such an important building like this.

Walmer Castle is now open following our works with English Heritage to conserve and refurbish the main building, please see their website for opening times and prices: http://www.english-heritage.org.uk/visit/places/walmer-castle-and-gardens/

Walmer Castle Stone Works

This week we hear from our Stonemason Foreman Paul, who recently worked for REDEC’s busy Refurbishment department on Walmer Castle near Deal in Kent…

walmer 3

Scaffolding carefully going up to the problem areas.

During the works a number of leaks were found, these were traced back to two different windows. It was found that a combination of issues had caused the leaks; a box gutter that was getting overwhelmed during heavy rain and historic stone repairs that had been undertaken by the former keeper of the castle, the Ministry of Works.

walmer 4

The Architect first inspecting the in situ mortar quality

As you can see in the photo a number of stones had been repointed in a cementitious mortar. This form of mortar would have been relatively new to the market during the early to mid-20th Century and the dangers of using such mortar was not known at the time. The mortar dries far harder than lime mortar (which should be used), it prevents nature moisture from leaving the stones, which leads to frost damage and cracking and its removal can also damage the in situ stones.
The other main issue with the cementitious mortar at Walmer is that it is not decoratively consistent. The original pointing was ‘galleted’, which calls for locally collected flints to be ‘knapped’ (cut into shards) and placed decoratively into the mortar beds. The ‘gallets’ are then stacked and cut to match the size of each respective stone in a decorative fashion. Part of our project here was to remove the faulty cementitious mortar, replace with a lime mortar (colour matched using ash and clay) and then ‘gallet’ throughout to match the mason’s patterns dating back to when the castle was originally built in the Tudor era.

walmer castle

Various photos showing the process at hand. Our excellent stonemason Rob is working around the lead hopper in the last photo.

The first task in repointing stonework is to accurately (to as far as reasonably possible) test what the makeup of the in situ mortar actually is. Sandberg LLP was appointed to test the mortar; they found that the mix used originally was a 1:1 mix of non-hydraulic lime and local sand. A similar mix was used, along with some fired ash and a hint of clay to colour the mortar to match the patina of the in situ mortar. Our stone masons used sand procured from a local supplier in Dover and added small quantities of the original mix back into the new mixes.

walmer

Our top notch stonemason Gary working hard to carefully remove the cementitious mortar

We then carefully removed the modern cementitious mortar, which luckily had not damaged the stones too much. Once the mortar had been mixed and the colour/finish approved by English Heritage and the Architect, the next task was to ‘knap’ the locally sourced flints to replicate the Tudor gallets. Knapping can take a considerable amount of time and can be very dangerous; fortunately our stonemasons are highly skilled for such tasks.
The finish as you can see below shows how well we matched the existing stonework and helped conserve this important scheduled ancient monument.

walmer castle

Paul our excellent stonemason had been with REDEC for over 9 years and first undertook his apprenticeship working on Westminster Cathedral some 30 years ago.

The system works…

This week we hear from our area contracts manager for East Kent, Leigh:

Clients not in the know often ask us ‘so what’s this window care system you use’? The overall system is actually called ‘Repair Care International’ and there are various techniques that can be used from this system, with the most commonly used one being ‘Dry Flex’.

Before and after to a window, repaired using the Dry-flex system

Before and after to a window, repaired using the Dry-flex system


The system was developed over 20 years ago in Holland to replace traditional pre-paint joinery repairs, such as scarfing and splicing which are typically more expensive, more time consuming and frequently fail, leading to costly premature paint breakdown and further timber decay. A tradition scarf to a window exposed to the elements will likely fail in year three with decay spreading from water ingression from year five. However, the dry-flex system is guaranteed to last at least ten years if used by a qualified and approved contractor; for which Redec has been approved now for over twelve years.
A lot of clients say ‘well isn’t it just a wood filler’? And the answer is emphatically no, it behaves nothing like a traditional decorator’s filler. The key aspects of the system are:
• The product expands and contracts to the natural movement of the in situ timber.
• When applied correctly it will adhere to all types of timber.
• Can we done quickly around the weather.
• Becomes rain resistant within a few hours.
• Can be used both internally and externally.
• Has a ten year guarantee.
• It can be used on other substrates other than timber.
• Retains more of the historic fabric of a building.

The Dry-flex system mid-use, showing how adaptable the system is.

The Dry-flex system mid-use, showing how adaptable the system is.

It is the later of these points that attracts a huge variety of clients. As a company we first became trained in the use of product whilst working for The National Trust. The Trust had been specifying the system for some years due to the system’s ability to prevent rot and retain as much of the original fabric of their large historic building portfolio as possible. Since then we have ensured all our repair staff have become approved for its use, making us one of the largest regional centres for its approved use in England. We have used it on scheduled ancient monuments, world heritage sites, listed buildings and everything else in-between.

For more information go to: http://www.repair-care.co.uk/

Leigh is our area contracts manager for East Kent, he has worked for Redec for over 20 years.

East Sussex Railway Station Repairs

The ‘R’ word is often a no-no in our industry (the word being ‘Restoration’) and though its use is frowned upon, the public at large recognise the word to mean working on heritage properties. It was William Morris (founder of SPAB) that said:

“It is in the interest of living art and living history that I oppose so-called restoration. What history can there be in a building bedaubed with ornament, which cannot at the best be anything but a hopeless and lifeless imitation of the hope and vigour of the earlier world?”

Though this unfortunate paradox exists (and we note the name of our blog too!), we can say that a recent project we worked on did call for actual restoration. When Morris was writing about the fake restorations of the Victorian period, he was complaining more about the process that he was witnessing then, so to skip forward 100 years to now we can make the same complaints but we can now strip back these modern and faulty additions to actually ‘restore’ what in all probability is actually there.


Taken from Wikipedia, a view of the station from the mid 20th Century

The project in question was our recent works to a small railway station in East Sussex. Our task was to work on the booking hall and waiting room of this station, to strip away the modern finishes that had poorly served the building and to restore it to how it would have looked from photographic evidence obtained. I wanted to share two key areas with you…


fireplace

The original fireplace finished with an oil-based gloss paint

First we considered the fireplace, which had been constructed from Bath stone. On inspection, it had been painted with umpteen coats of standard undercoat and gloss. Further tests outlined that no lead paint was present, which is a key safety point for paint removal. Using the poultice method of paint removal (which is the most efficient method for not damaging the substrate of your project), we removed over 9 layers of paint before we hit a problem. Under the paint existed a thick coating of bitumastic. The chemical we used to remove the paint could not touch it and only appeared to move it around and create a treacle like substance. Unperturbed as we had encountered this before, we managed to carefully remove the thick covering using an alternative stripping product. Soon the bitumastic was completely removed and graffiti that had probably been hidden was once again revealed after over 75 years or more hidden under the sticky coating (such was the careful deployment of the stripper by our staff).


photo 4

The horrible bitumastic coating underneath was exposed. A product that was readily available in the railway industry as it was used to coat the railway sleepers and various track plant


The finished fireplace

The finished fireplace complete with characterful Edwardian graffiti

The next area of consideration was the windows, particularly their reveals. The windows reveals had been painted with a vinyl paint coating, which is highly unacceptable for the lime rendered walls. The vinyl had created a barrier upon which the walls could no longer breath, this was further accelerated by the contents of various isolated repairs which had been undertaken throughout.


This photo shows the extent of the modern fillers that were plaguing the building - note the beautiful quoin detailing too

This photo shows the extent of the modern fillers that were plaguing the building – note the beautiful quoin detailing too

Stripping back the paint coatings, we found uses of modern polyfillers, gypsum and sand/cement, all of which are non-compatible with lime rendered walls and stone rubble-core interiors. The paint and repair combinations had effectively locked in the damp from the exterior walling that otherwise would have dispersed naturally. We then carefully removed the foreign items from redecorations past, and carefully filled with a similar mixed NH lime plaster. On completion we applied several coats of a coloured lime wash to allow the walls to breath once again. We also undertook a number of other conservation repairs and redecorations before handover to the client, for which we will comment on in another blog. However for now, these two items for this project go to prove that the ‘R’ word is not all that bad after all…


Note the moisture starting to travel from the substrate in the newly restored reveals

Note the moisture starting to travel from the substrate in the newly restored reveals


A blog by Project Manager Chris, who is a chartered surveyor and builder who works within our refurbishment and building department.